Monday 27 July 2015

Try My Code: An alternative to Tryit Editor v2.3.


Try My Code is an offline HTML try-it script, that shows the output of your HTML code(For those who are on a development server or Learning.


Features:

  • WYSIWYG -You Can See Instantly What You Did .
  • Lightweight  -This File Is Only 200kb .
  • Portable -No Installation Required .
  • Syntax highlighting -Displays Text, Especially Source Code, In Different Colors .
  • Browser Support : Any Browser Except Internet Explorer or Similar .
  • Lock Me: Can Lock Option Panel .
  • Reset : Everything Get Back as Before .


Download


PHP: Simpe Upload Form and Function.

Hey there!, Here is an image upload form coded in PHP and HTML..

1st. Create a file named form.php and put this into it..

<!DOCTYPE html>
<html>
<body>
<form action="upload.php" method="post" enctype="multipart/form-data">
<input type="file" name="filetoUpload" id="filetoUpload">
<input type="submit" value="Upload Image" name="submit">
</form>
</body>
</html>

After that, Create a File named upload.php and put this into it..
 <?php
$targetdir = "uploads/";
$target_file = $targetdir . basename($_FILES["filetoUpload"]["name"]);
$uploadOk = 1;
$imageFileType = pathinfo($target_file,PATHINFO_EXTENSION);
//Check if image file is actual image or false
if(isset($_POST["submit"])) {
    $check = getimagesize($_FILES["filetoUpload"]["tmp_name"]);
    if($check !== false) {
        echo "File is an image - " . $check['mime'] . ".";
        $uploadOk = 1;
    } else {
        echo "File is not an image.";
        $uploadOk = 0;
    }
}
//If file exists
if (file_exists($target_file)) {
    echo "Sorry, file already exists.";
     $uploadOk = 0;
}
//File size
if ($_FILES['filetoUpload']['size'] > 500000) {
    echo "File too large.";
    $uploadOk = 0;
}
// Allow only image
if($imageFileType != "jpg" && $imageFileType != "png" && $imageFileType != "jpeg" && $imageFileType != "gif" ) {
    echo "Sorry, only JPG , PNG, JPEG and GIF files are allowed.";
    $uploadOk = 0;
}
//Check if $uploadOk is set to 0 by an error
if ($uploadOk == 0) {
    echo "Sorry, file not uploaded.";
//if everything is ok, try to upload
} else {
    if (move_uploaded_file($_FILES['filetoUpload']['tmp_name'], $target_file)) {
        echo "The file ". basename( $_FILES['filetoUpload']['name']). " has been uploaded.";
        } else {
            echo "Sorry, there was an error uploading your file.";
        }
}
?>
NOTE: Create a folder named "uploads".


Now there you have an upload form that validates and image, and is secure too... Have a great day!

How to enable htaccess on XAMPP.

By Default, a normal htaccess with 'Rewrite Base /' in your .htaccess file in xampp wont work..

So to fix that remove '<IfModule mod_rewrite.c>' and 'Rewrite Base /' from the htaccess configuration and save.
This works for me, hope u find it useful..

How to Route Entire Ubuntu Systems

Hello there, ever since i became an Ubuntu user i've had a great experience..


I use the Internet behind a proxy server so i could only use the applications that enables custom proxy configurations etc.

To do this, you'll need.
1. The IP and PORT of the Proxy Server.
2. Unity Desktop or Gnome


Now, Navigate to System Settings
 Click on Network - Network Proxy then click on the Drop-Down and select Manual.
Then Fill in those Proxy types and click Apply System Wide..

Thats all.. :)

How To Have a Dump Of Your Blog Posts & Comments (For Blogger/Blogspot Users)

The Blogger / Blogspot platform from Google had

been very dependable by its users for a very long

time now, unlike WordPress which uses Hosting to

run their platform, Blogger is cheaper to control

and does not require hosting, so we hardly ever

get issues concerning our blogs, still we have to

accept the fact that anything can happen to your

blog anytime without your notice.


So many bloggers have lost their blogs in different

ways, some were due to their own mistakes,

others, were for unknown errors that can best be

explained by Google.

Meanwhile, as an inspiring professional Blogger,

there are certain IMPORTANT Activities and Check

ups you need to be doing periodically, Backing Up

your entire blog is one of them, in this post, I'm

sharing with us how we can do it, so you can

- Save a Complete copy of your entire blog posts

and Comments in your hard drive

- Upload the posts to a new blogger blog, or add

the posts to a Pre-existing one, it's really Simple.


Login to your Blogger Dashboard

*Settings >> Other >> Find - Import

Blog - Export blog - Delete blog


To save all the copy of your blog posts

with comments Click Export blog

To upload the entire Blogger to a New

one after saving to your hard drive,

click Import blog

You've worked hard writing and publishing

unique stuff for your audience, this hard work

Saturday 18 July 2015

OS: Installing Kali Linux without a Disk/Pen-Drive.

---Get these first.

--- Kali Linux iso (64bit or 32bit) 
(NOTE: Use the image for your systems architecture, otherwise things wont go smoothly)
Link: http://kali.org
--- UNetBooting software.
Link: http://unetbootin.sourceforge.net
--- EasyBCD by NeoSmart
Link: http://neosmart.net/EasyBC

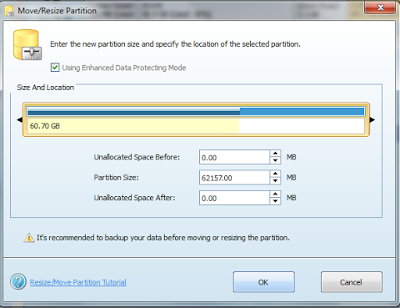
A 30GB Partition(Unallocated). 
---------------------------------------------------------

Step 1: Open UnetBooting in Windows, Click on Diskimage, then select the Kali .iso file.

Step 2: Choose Type as Hard Disk, Choose your drive, C:/ then click OK.

Step 3: When the process is done, Reboot the system. And when it boots up, click on UnetBooting, wait for it to say Press ESC etc, quickly press ESC and choose Kali Live USB Security Persistent, and wait for it to boot into the Desktop.

Step 4: Click on Applications at the Top, and goto System Tools - Install Kali Linux.

Step 5: Go through the process correctly, until when u get to Network, i mean connecting to a wireless network..

NOTE: You must connect to a wireless network, and it must have internet access. If u dont have this, quit this installation.

Step 6: If you see "Guided Partition in Largest storage" or something related to that, click on it, and confirm that, that is the partition u created earlier by reading the information u saw.
Then click Next, and do what the installer says..

Step 7: Install the system, and when u get to "use a network mirror" click YES.

Step 8: It will now try to install GRUB bootloader,


NOTE: Please, know your Kali Linux partition name/id before continuing. Type in your partition id eg "/dev/sda5" then continue.

Step 9: Everything is being finalized and when the installer is done.. Exit the live system, and boot into Windows.

Step 10: Open EasyBCD, click on Add New Entry, click on Linux tab, and select GRUB2, then select Automatic. Then add the Entry..

--Reboot the system, select the Neosmart Linux or whatever u named it. and VIOLA!! you will see GRUB bootloader, just select Kali Linux and you're in.


NOTE: This Tutorial has been tested on Windows 8 Pro, Windows 7.... But Windows 8 (EFI) It wont work.

How To Create A Partition in Windows.

Today i will introduce to you a tool i love, MiniTool Partition Magic..

I recommend this tool for partition handling.. alriight.. lets get to it!


We are going to create a New Partition with it, its very easy.


1st: Open the software..


2nd: Click on the partition you want to resize, and click on Move/Resize Partition.


Now Move the Bar/Arrow to the amount of space you want, then click OK.


Thats, all.. It might ask u to reboot..


NOTE: Becareful, dont delete your data.